创建 GitHub 仓库
- 登录 GitHub。
- 点击右上角的加号
+并选择New repository。 - 为你的仓库命名,确保选择
Private选项,然后点击Create repository。
初始化本地仓库并推送到 GitHub
在本地博客文件夹中,初始化 Git 仓库并推送到 GitHub:
1 | cd /path/to/your/blog |
配置Github Action
修改_config.yml文件
1 | deploy: |
创建工作流文件
在博客根目录创建 .github/workflows 文件夹,并在其中创建工作流文件autodeploy.yml。
1 | name: 自动部署 |
配置Github Secrets
点击
Generate new token按钮。输入一个描述,例如
Hexo Deployment Token。选择
repo范围的权限(包括repo,repo:status,repo_deployment,public_repo,repo:invite)。点击
Generate token,生成一个新的 token。复制生成的 token 并保存下来(注意:你以后无法再次查看此 token)。
打开你的 GitHub 仓库页面。
点击右上角的
Settings。在左侧菜单中找到
Secrets and variables,然后点击Actions。点击
New repository secret。设定
Name为DEPLOY_TOKEN,并将生成的 token 粘贴到Value中。点击
Add secret。
提交到github上
1 | git add . |
部署到vercel
添加vercel部署文件
在blog文件夹中添加vercel.json文件
1 | { |
在vercel中进行部署
- 注册vercel账号,绑定github账号
- 在dashboard页面点击
Add New -> Project,选择博客仓库,点击import,然后Deploy - 等待自动构建完成即可看到网页
obsidian配置自动发布
现在打算专注使用obsidian来进行博文记录了,但是每次更新都需要手动git add、git commit和git push的,感觉有点麻烦。
于是在网上搜寻,发现obsidian中有两个比较好用的插件能支持更新后自动推送,分别是git插件(曾用名为obsidian git)和enveloppe插件(曾用名为github publisher)。在经过简单的对比后,感觉enveloppe使用似乎更便捷,更适合我的智力水平,因此决定放弃git,采用enveloppe来进行实现。
配置enveloppe插件
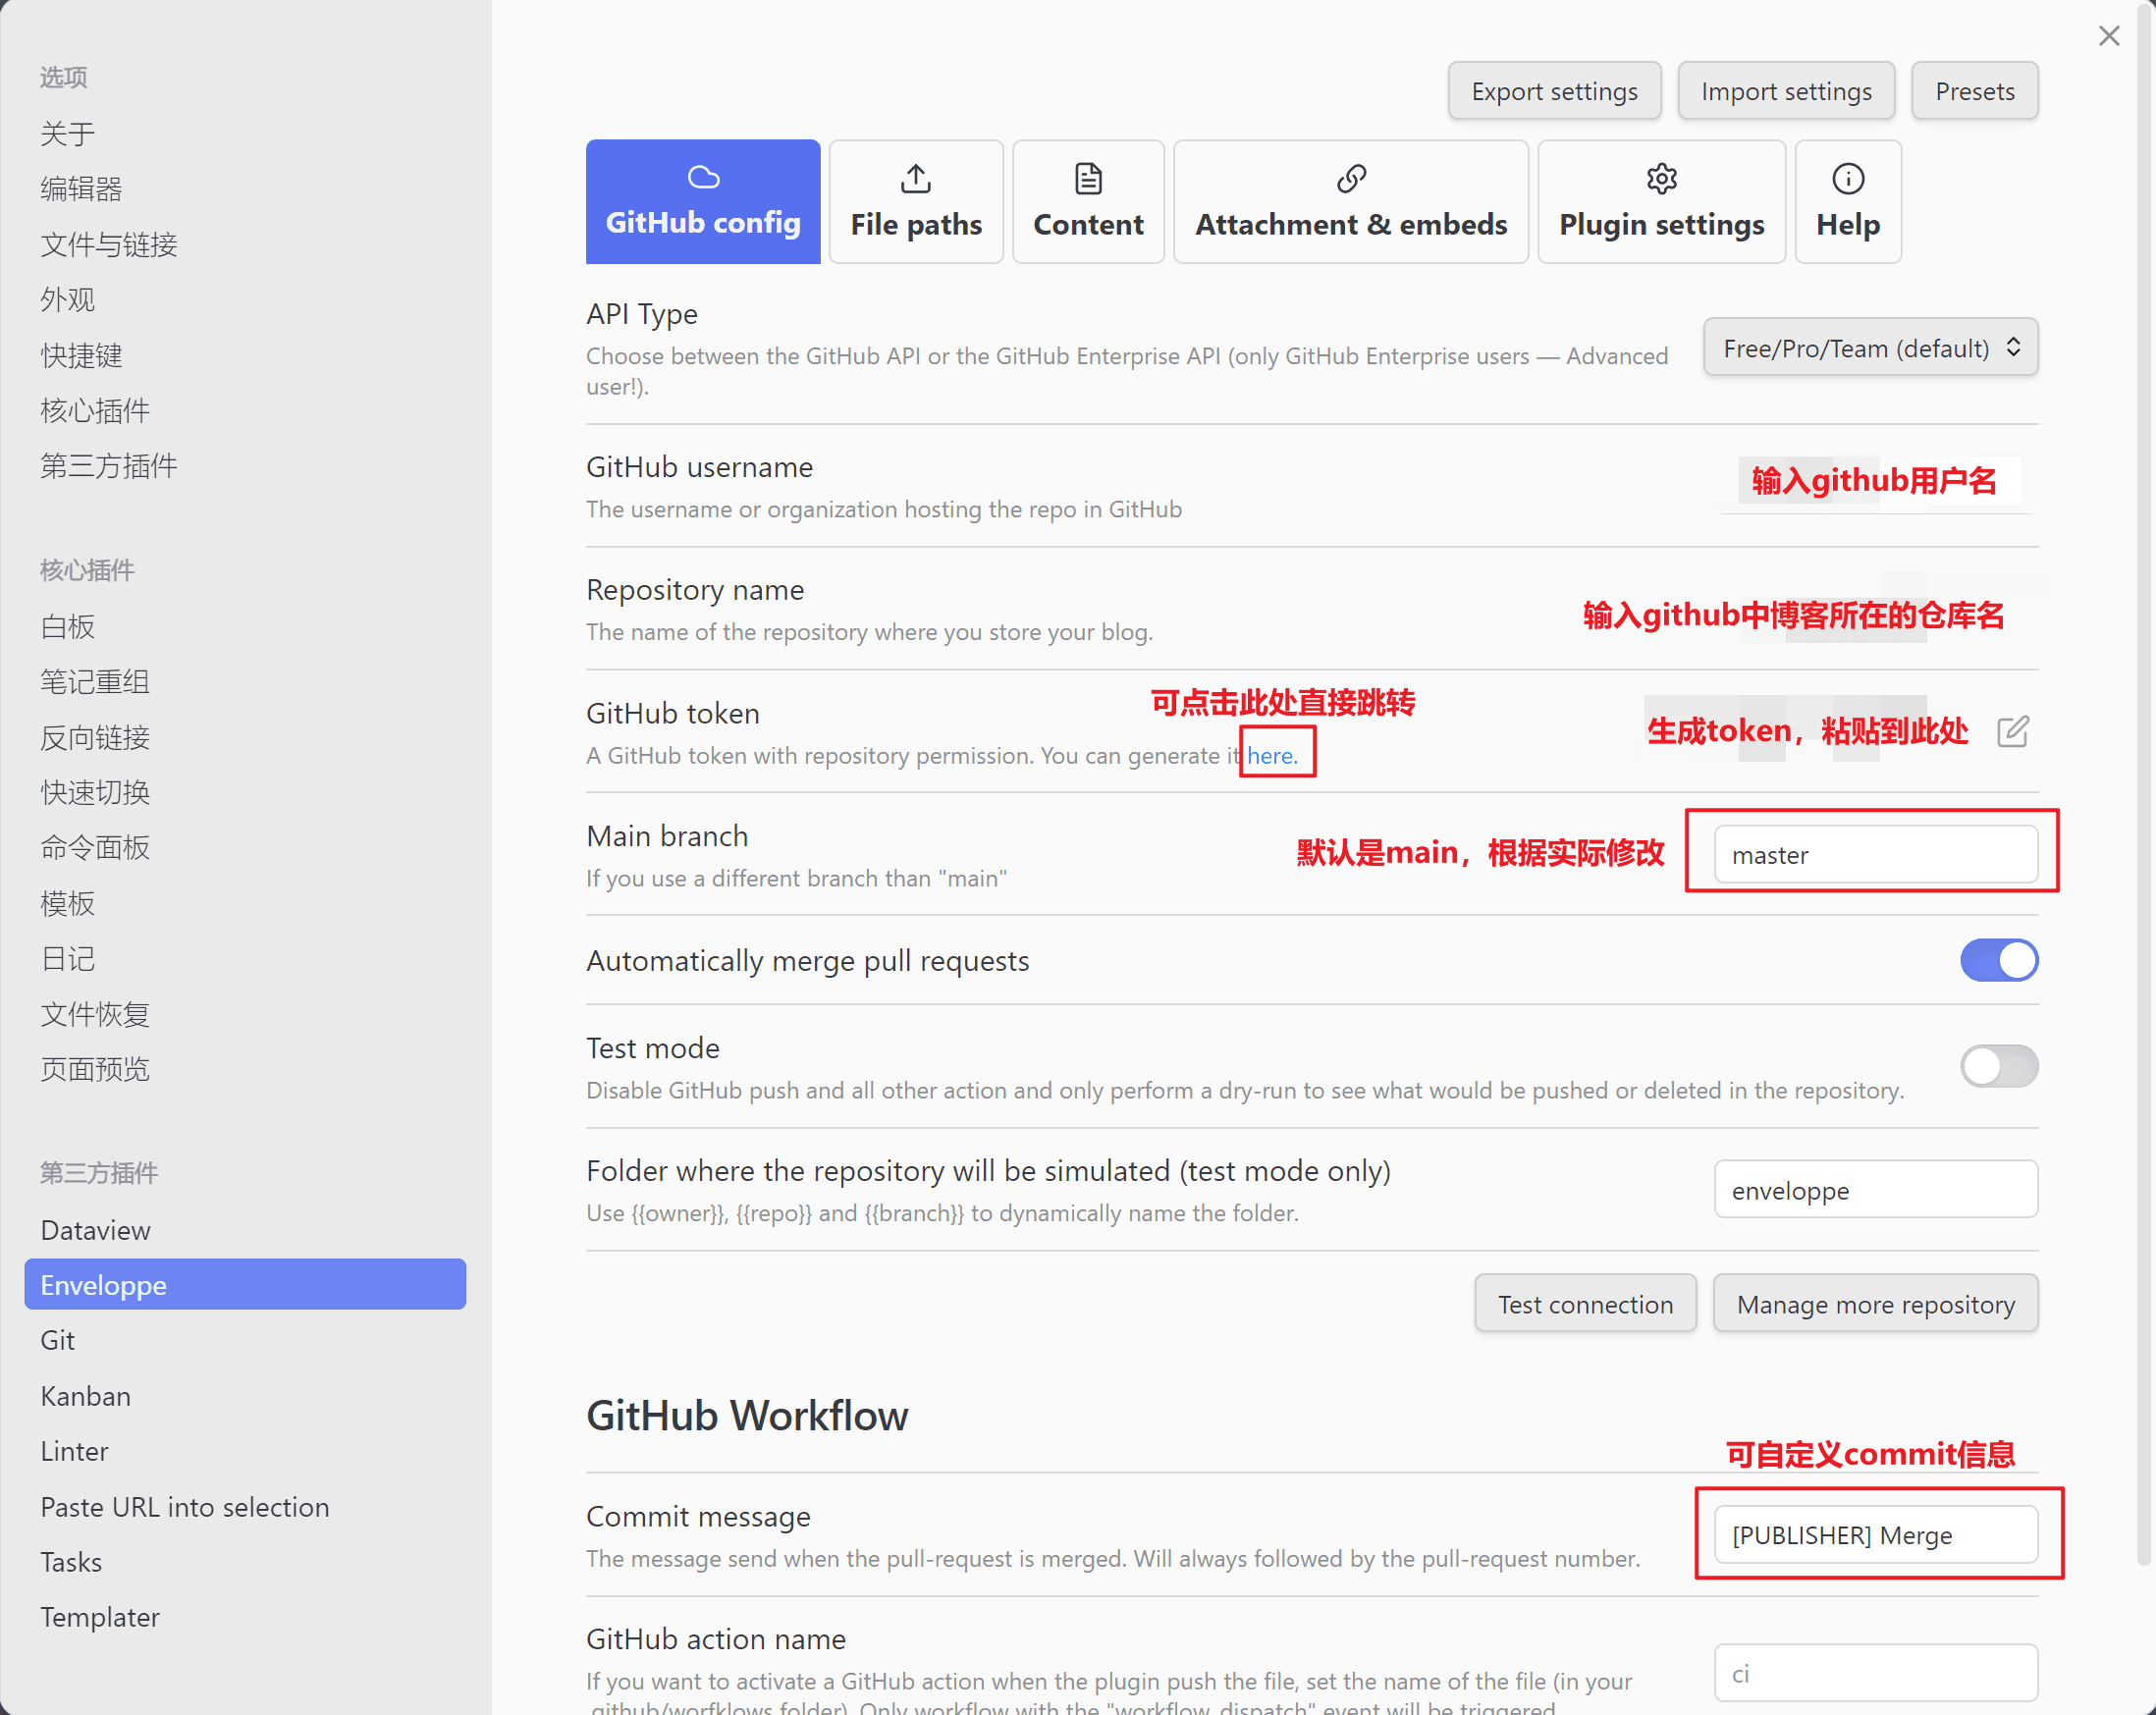
Github config配置

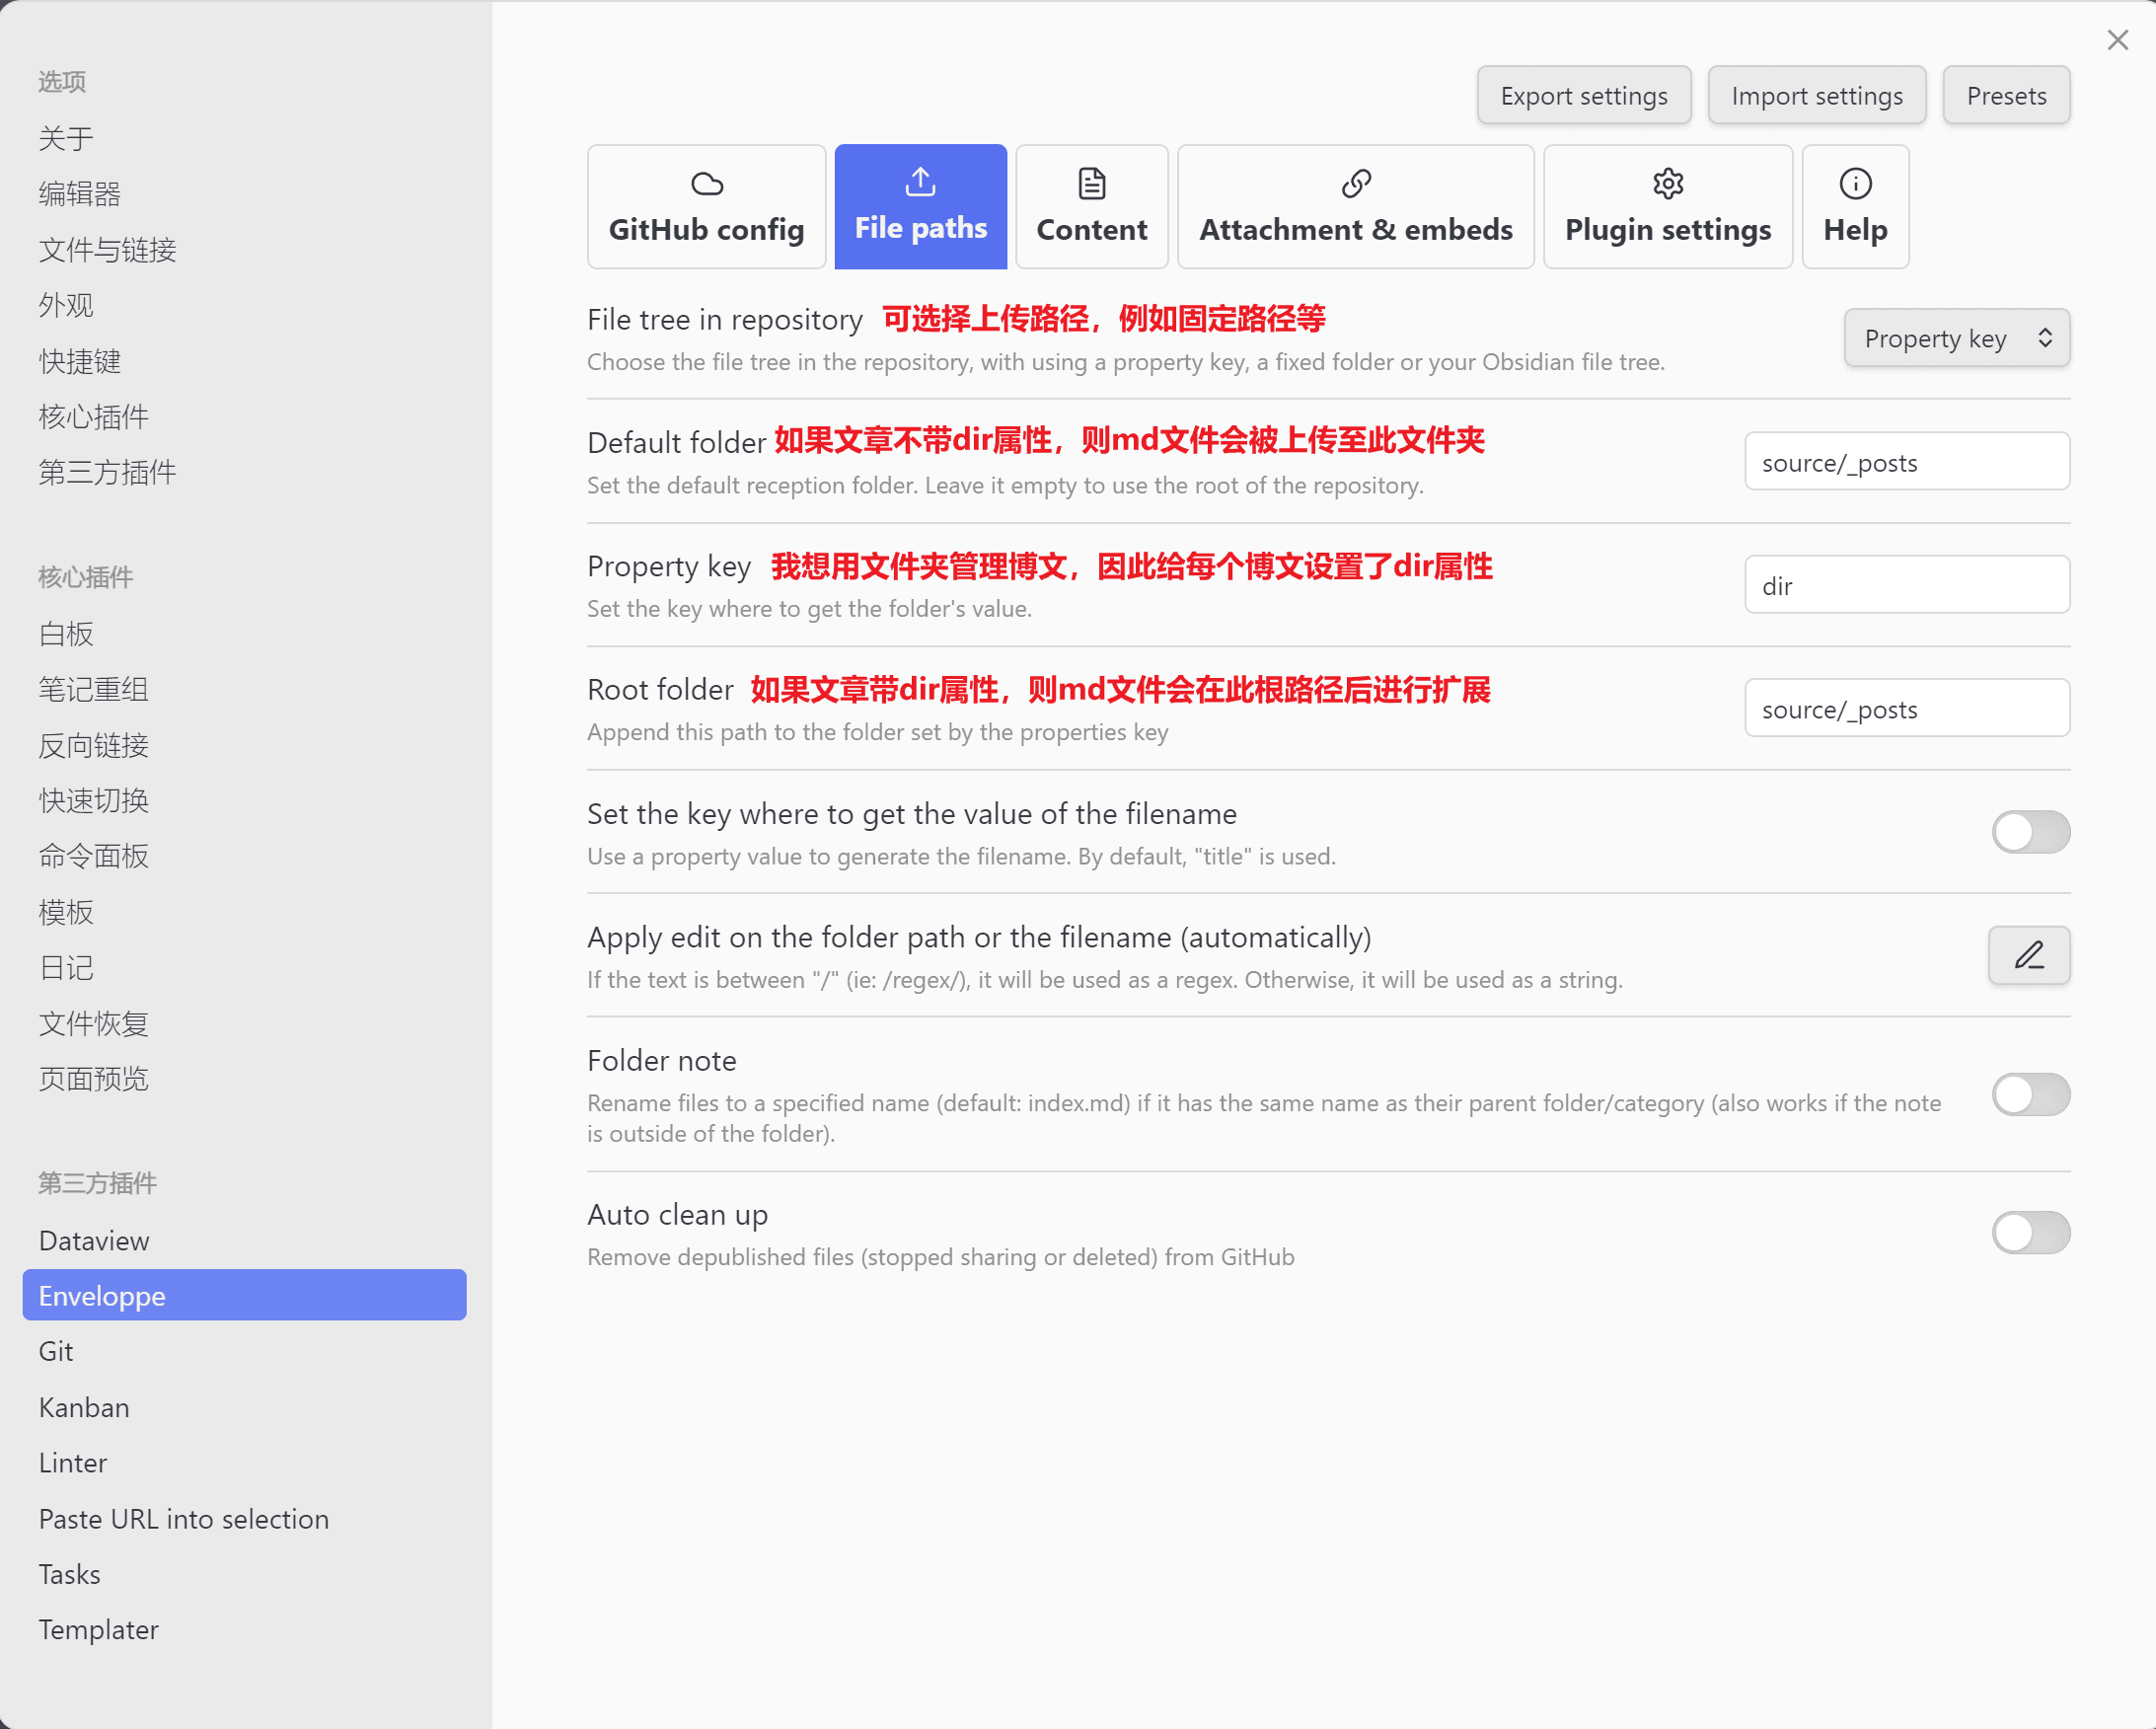
File paths配置

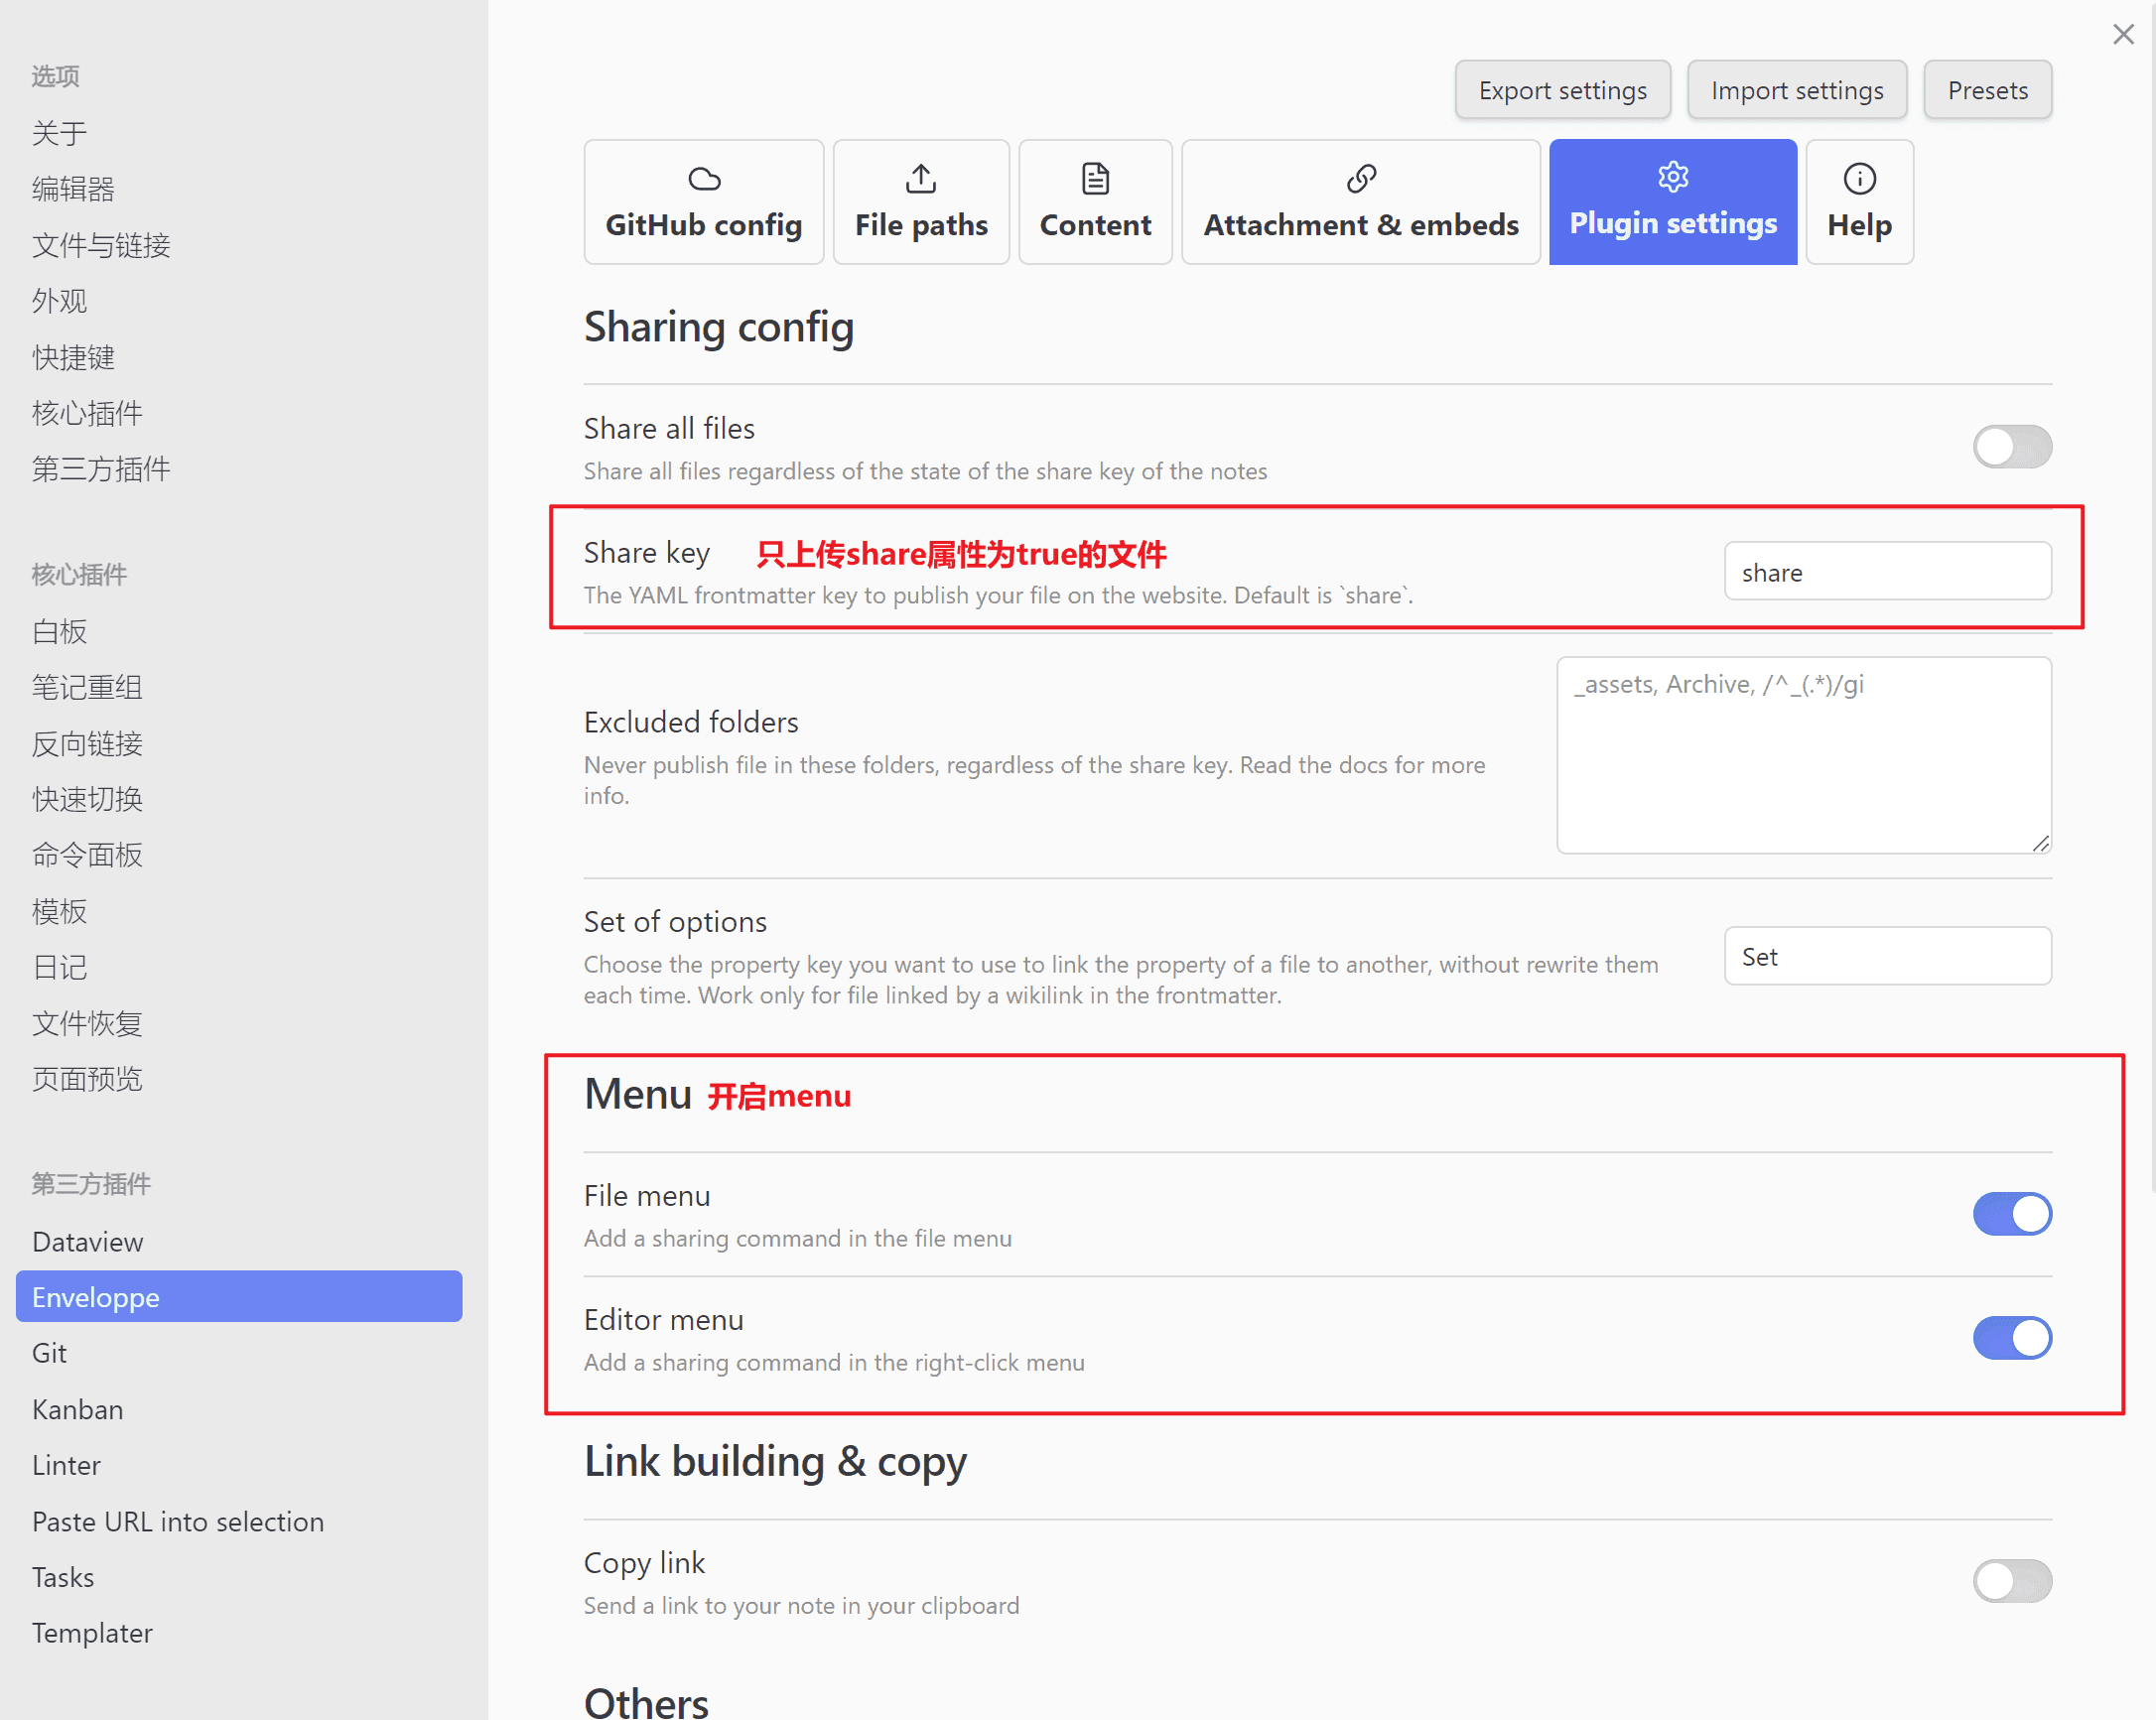
Plugin settings配置

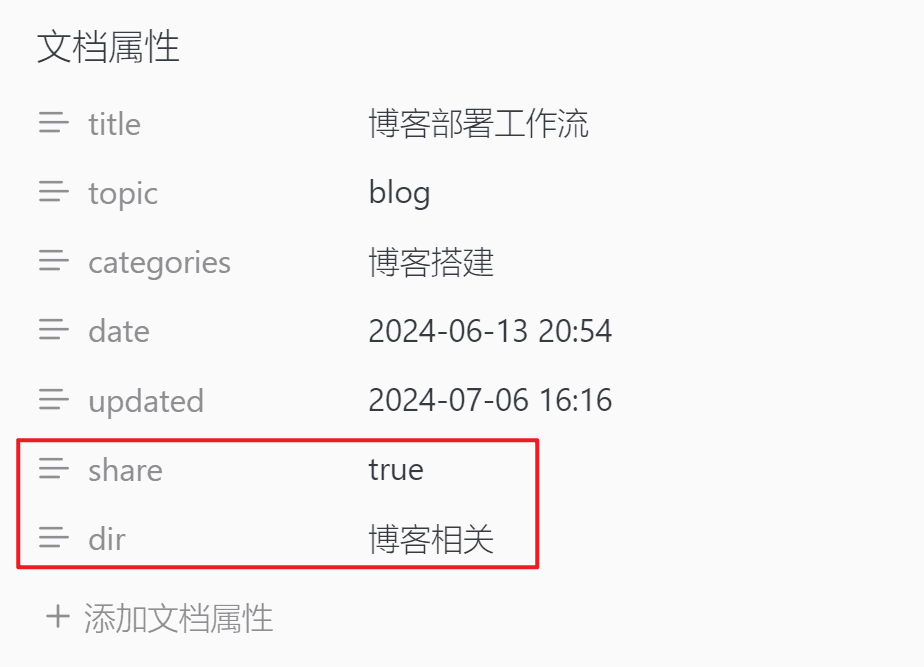
增加md文件frontmatter
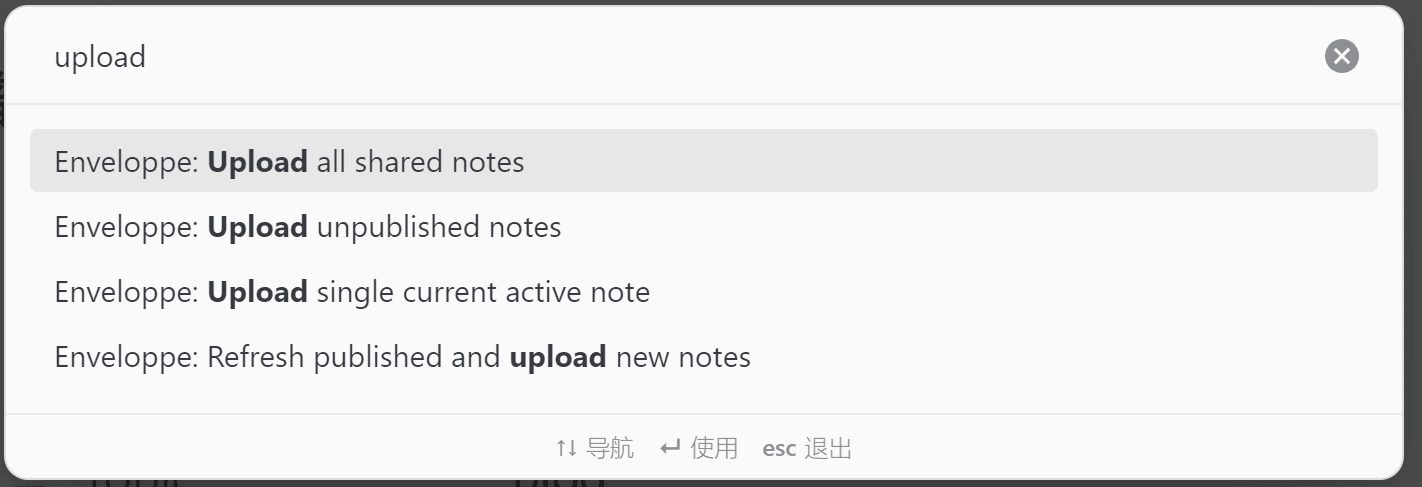
利用命令快速发布
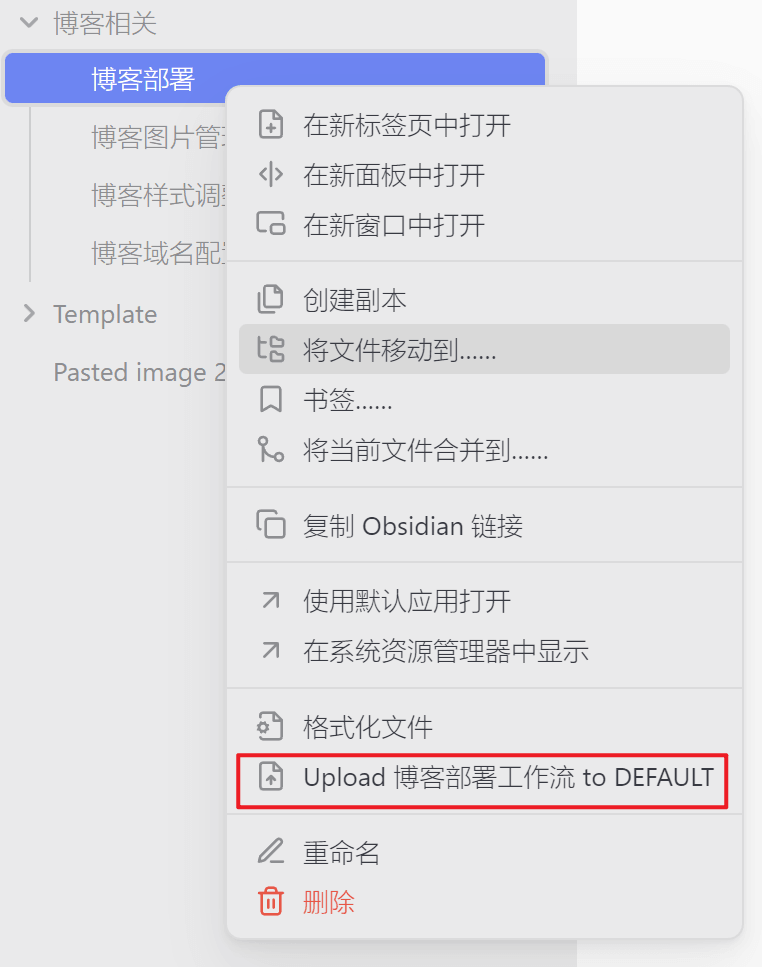
crtl+p调出obsidian命令面板- 根据需求选择命令发布

或:
- 开启
Menu后 - 在对应文件处右键,选择命令发布

亟待解决
enveloppe官方文档上支持的命令有很多,例如Purge,但是调出命令面板却找不到,如有知道如何解决的好心人,烦请指点一下QAQ
参考资料
利用Hexo搭建你的个人网站 - 中篇
hexo博客工作流CI
博客进阶:自动化部署
使用 Obsidian 免费建个人博客
Github Publisher 插件适配 Hugo 的配置
obsidian如何自动发布hugo博客
