图片压缩
懒得在原文进行修改了,直接另开一章记录更新操作吧。
2025/02/22,昨天总算是把图片压缩搞好了,但是一个个手动merge怪麻烦的,于是又委托了俺的AI小助手们,修改了github action,现在效果是每次
2025/02/21,上次配置Imgbot不成功,打击了我优化博客的热情(其实还是懒)!但最近又虚无主义了,决定借助万能的AI助手们重拾一下!总之又搜索发现了image-actions这个方案,看起来似乎比较容易配置。不过这个似乎只能优化新上传的图片,不管了我先试试叭。
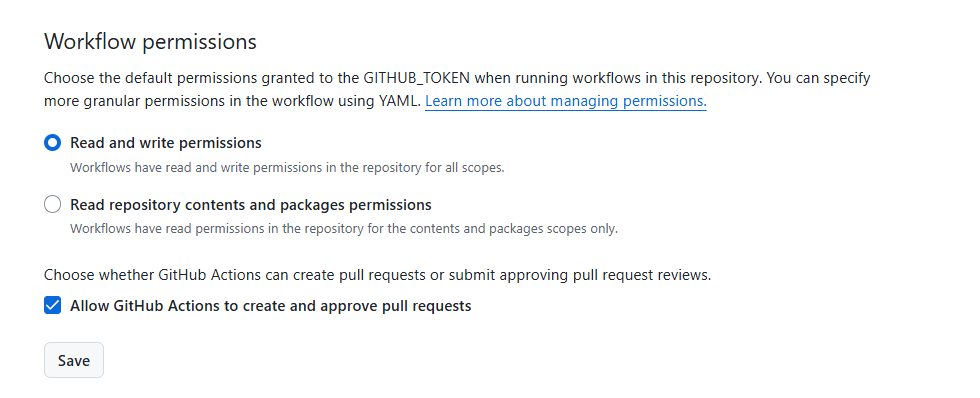
因为现在博客里已经有蛮多图片的了,想着要是压缩和替换不分开、这样要是失败了呢就有点麻烦,所以先采取了介绍里的Process Pull Requests from forked repositories,直接复制代码再上传照片试试,一直失败,总是提示GitHub Actions is not permitted to create or approve pull requests,找了AI助手们,都说让我加个permission,但是加上去后没有什么变化。折腾一番后,才发现其实要在仓库中设置允许Github Action去创建和同意PR。
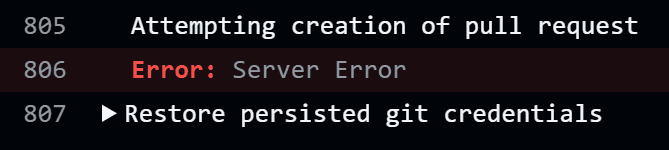
本来以为这样就可以了,结果再次测试运行发现还是提示了Server Error,百思不得其解时却发现同时有一个压缩成功的PR。很诡异,抱着可能系统不稳定呢的想法重新运行了一次,又是同样的结果。
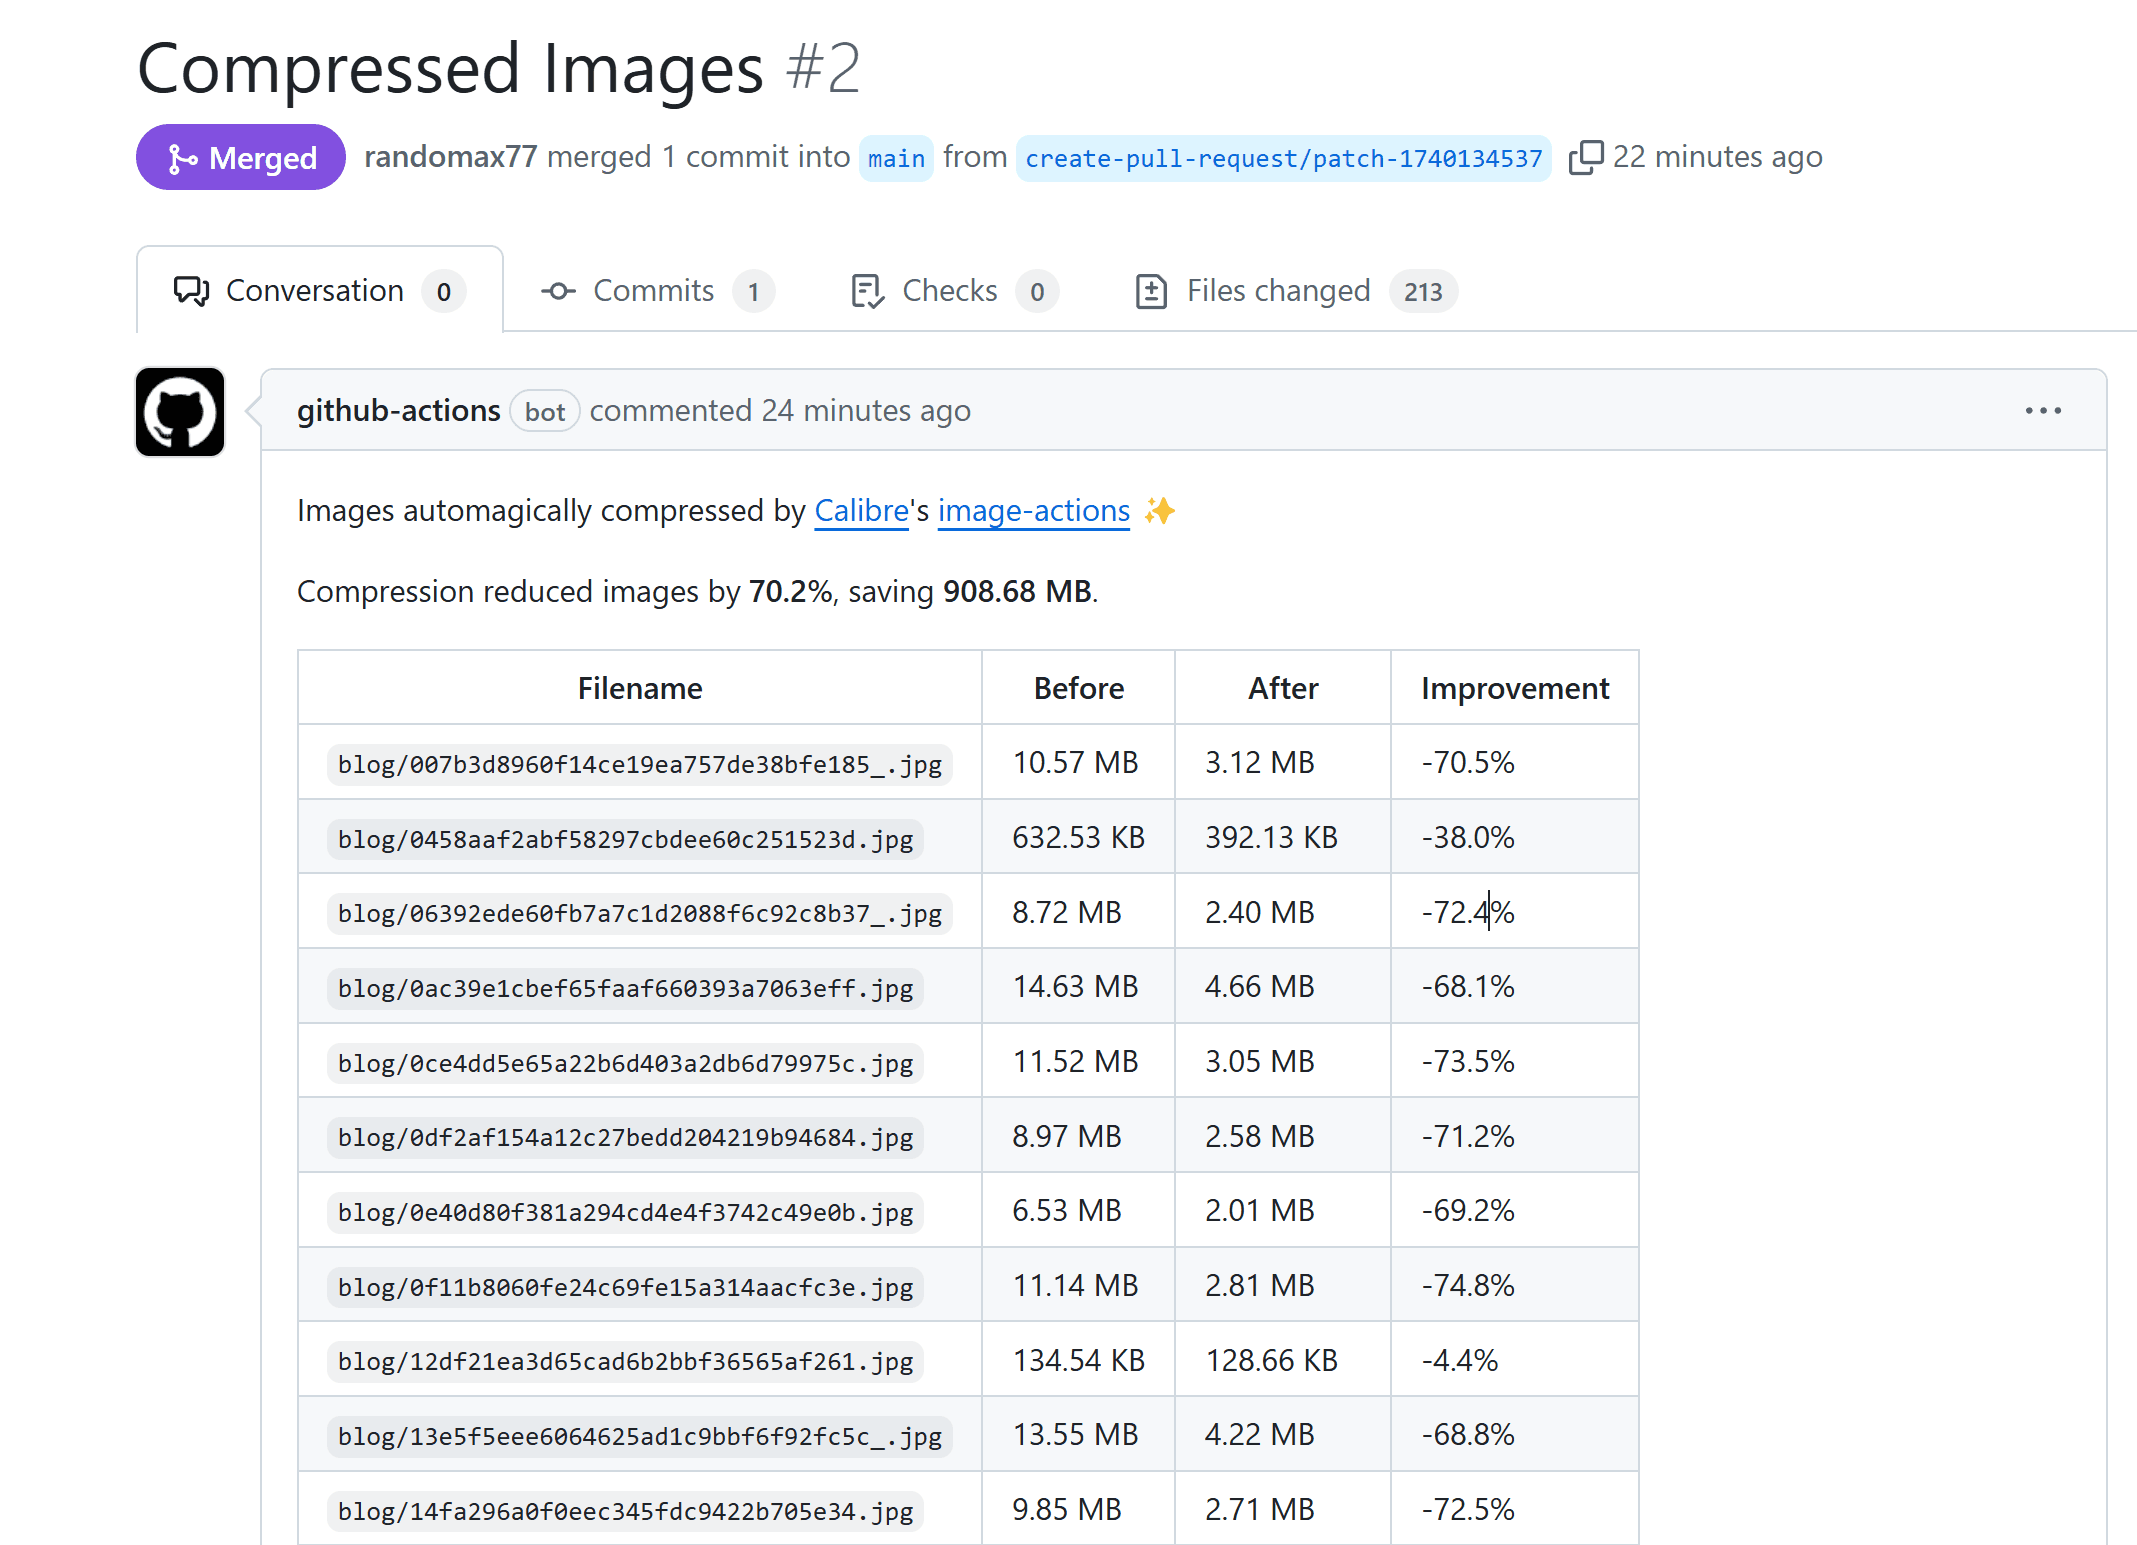
不过这时我想,那就看看效果咋样!所以直接就Merge了。这时再次回到我的博客,发现确实图片加载的速度好像快了点,但有一个问题!竖图被压缩后就变成横图了……这个是为啥又该咋调整俺还不知道,之后再说吧反正也没有人真的在看我的博文……
接下来再试着上传了新图片,发现这时都能正常运行Github Actions且不再出现上面曾经出现的Server Error。
不过看运行记录中发现,每次新图片上传到Github上,它都会对历史的图片进行检索看是否需要优化,然后得出无需优化的结论;接下来才是推送PR,我再重复Merge动作。
有点麻烦,准备后续把compressonly设置为false,不过还是先记录一下现在的代码(就是文档中的代码加上permission啦)。
1 | name: Compress Images on Push to main branch |
2024/12/05,下定决心压缩博客图片。现在俺博客上用到的图片已经很多,我也不想再一个个更改,通过搜索发现了Imgbot这个插件,决定直接试一下!
Don’t spend another second worrying about compressing your images. Install Imgbot into your GitHub projects, and focus on your application.
OK很满意这里介绍的效果!而且对于开源项目是免费的,那我就直接安装了。安装非常简单,按照指引选择open source方案,确认订单信息后就可以选择需要优化的博客仓库,默认是所有,我先谨慎只选择了存放图片的仓库,Install确认后就会跳转到新界面说That's it! You did it! Imgbot is starting to work on your first pull requests now.
BUT!重点来了,我苦等良久,还是没收到介绍中说的优化后合并PR的信息,但到Imgbot个人页面中看,又提示确实已经提交了压缩图片的申请。考虑到网站页面写着2017-2022,姑且认为它已经停止维护了吧。
总之这个方法对我的博客是不起效了。
2024/08/01,使用jsDelivr来加速Github访问。
1. 在_config.yml中增加use_jsdelivr: true
2. 创建辅助函数
1 | ; |
3. 修改Markdown渲染器
1 | hexo.extend.filter.register('after_post_render', function (data) { |
由于该方法导致部分图片错误旋转,已弃用。(2025/08/27)
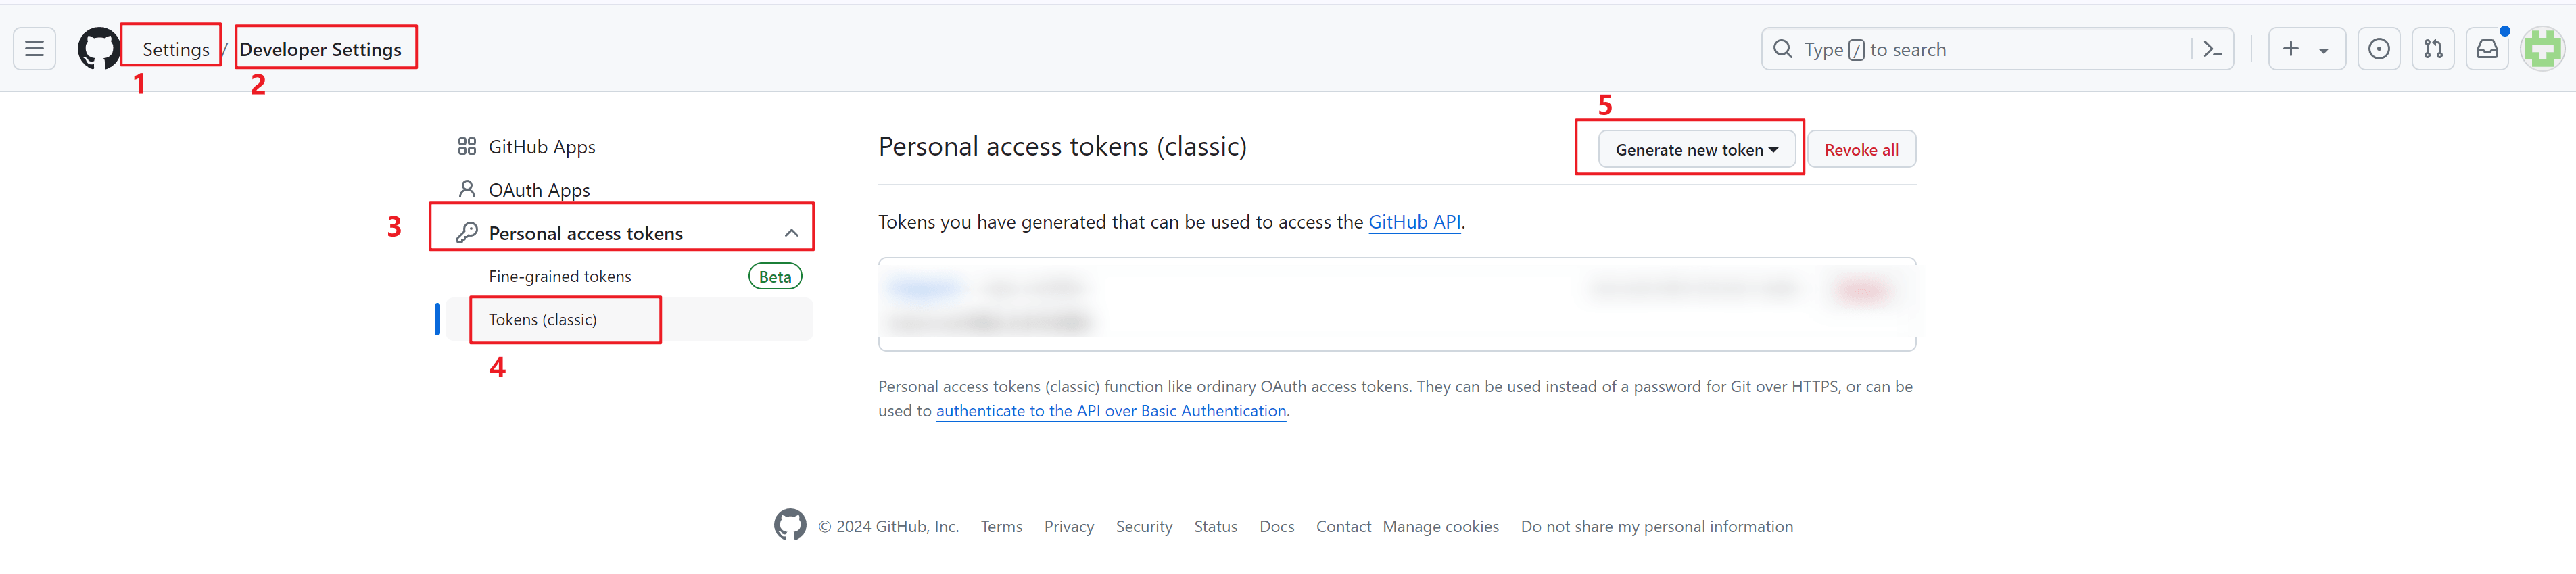
Github配置
创建
公开仓库进入个人
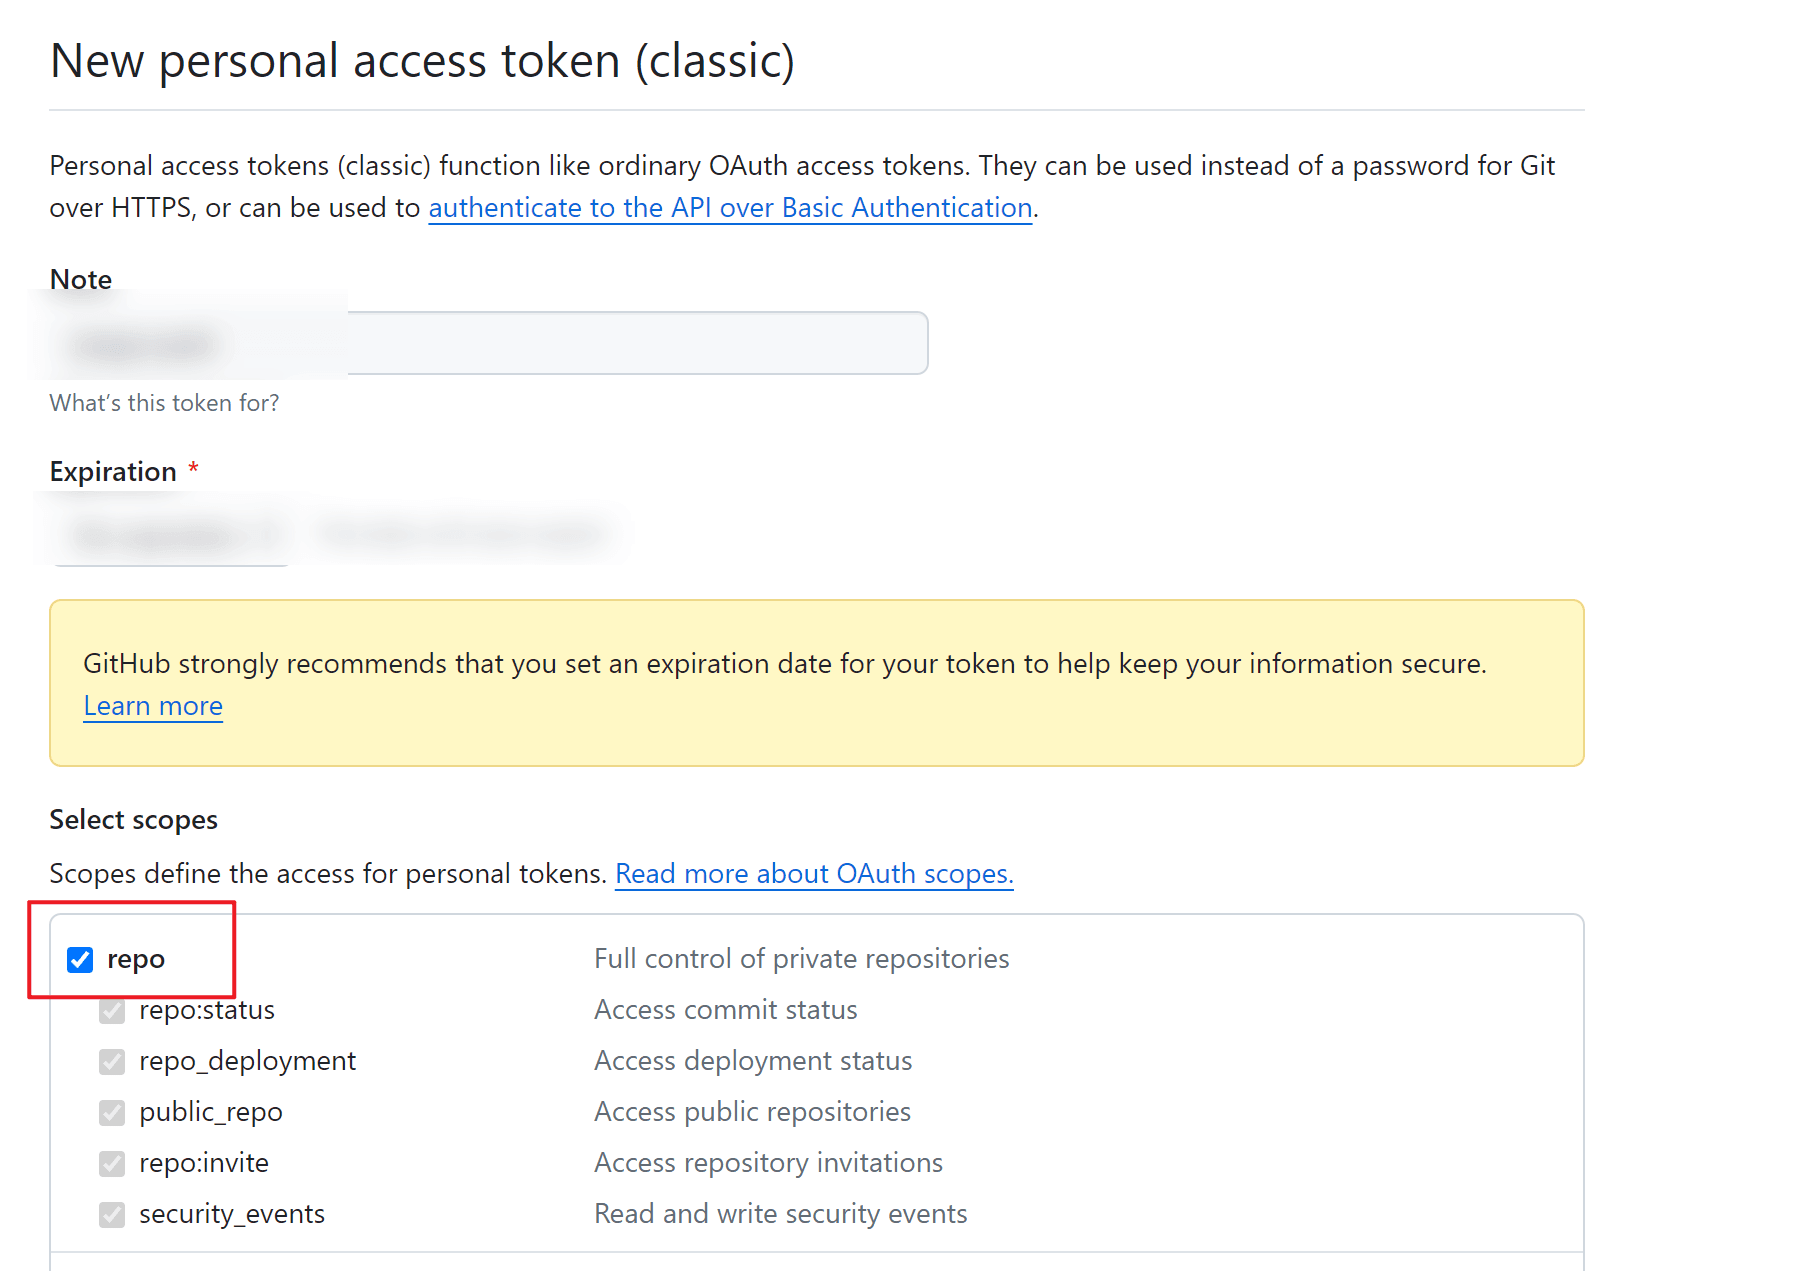
Settings页面,选择Developer Settings-Personal access tokens-Tokens(classic)-Generate new token(classic)
填写token属性,注意勾选
repo,然后点击下方Generate token生成后会跳转回原来的界面,绿色方框内会出现一串长字符token。这个token只会出现一次,务必记下使用。
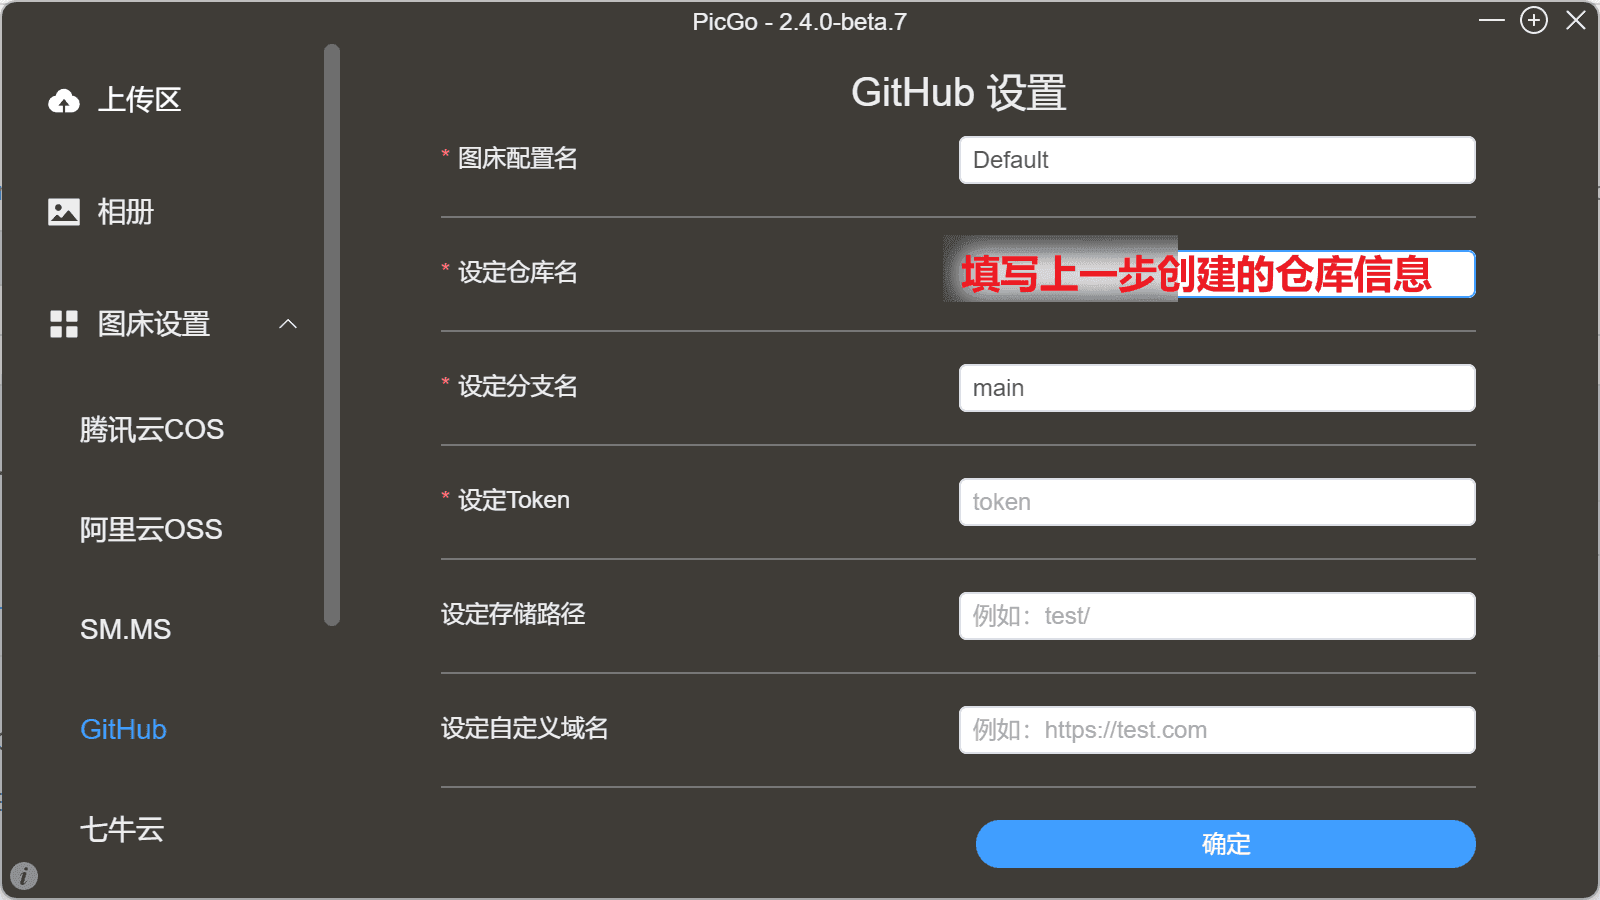
PicGo设置
下载PicGo安装包,安装后打开
在
图床设置中选择Github,更改信息。存储路径可以选择让上传的图片单独放在仓库的某个文件夹中回到
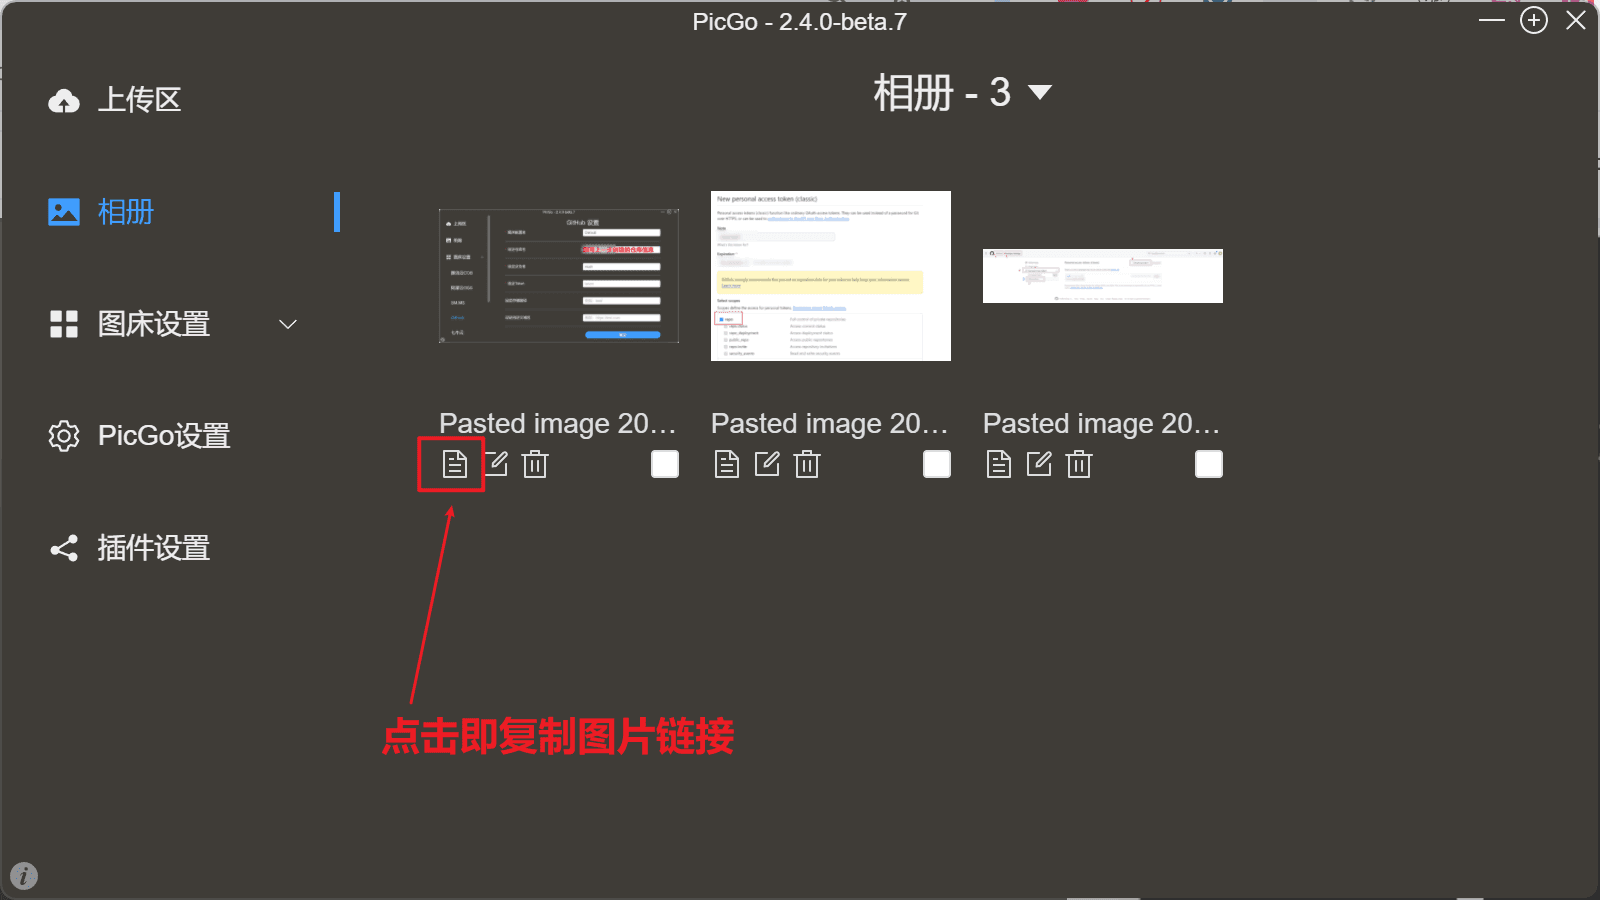
上传区,上传后就可以看到图片出现在github仓库里啦点击相册,可以直接复制图片链接进行访问
参考资料
使用PicGo + GitHub 搭建 Obsidian 图床
PicGo+GitHub搭建免费图床
利用GitHub Actions自动对仓库内图片进行无损压缩